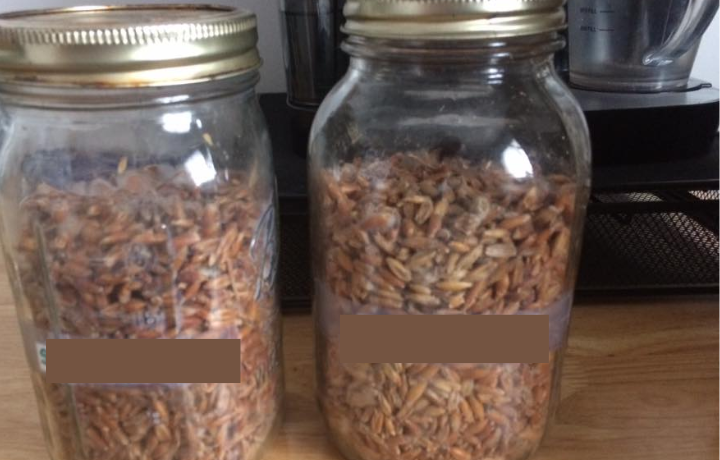
By producing your own grain spawn, you can cultivate virtually any type of mushroom. The process isn’t as complex as it may seem. In this article, I show you step-by-step How to make mushroom grain spawn at home without the need to buy it.
You won’t need to dedicate a lot of space or money to creating a mushroom lab.
However, you will require some equipment, such as a pressure cooker or pressure canner, but not a laminar flow hood, which is often the most daunting obstacle for novice growers.
You can make the grain spawn without the use of a laminar flow hood.
In fact, you can inoculate it in the open air without having to take too many special precautions. The trick to being able to do that has to do with this specially constructed lid that contains something called a self-healing injection port.
It’s super easy to make, and it makes the process of making your own grain spawn really easy. So the basic process for making your spawn is to take a cereal grain like rye or wheat berries, soak them overnight, and then simmer them on a stove before filling them up into these jars with these specially constructed lids.
To produce grain spawn, start by taking cereal grains such as rye berries, which are ideal for cultivating mushrooms. You may also use wheat berries or brown rice. Soak the grain in a bucket of water for 12 to 24 hours, allowing it to absorb the moisture that the mycelium will require to grow.
Afterward, drain the grain and transfer it to a glass jar with a self-healing injection port. Pressure sterilize the jar for about 90 minutes at 15 psi. Once sterilized, use a liquid culture syringe to inoculate the grain through the injection port. After a few weeks, you’ll have some ready-to-use grain spawn for your mushroom project.
Now, you don’t want to soak it for too much longer than 12 or 24 hours, because eventually, the grains will sprout. And you want to get your grains fully hydrated, but you don’t want them to sprout.
In a previous article, I demonstrated how to add coffee, gypsum, and other ingredients to a bucket while it’s soaking. However, this step is not necessary, particularly if you’re only growing on a small scale. Simply add water and let the grains soak. Keep in mind that the grains will absorb a significant amount of water while soaking, resulting in a hydrated volume that is typically three to three and a half times greater than the dry volume of the grains.
To produce 10-quart jars of grain spawn, you’ll need approximately 3 to 3 and a third-quart jars of dried grain. Measure out about 3 and a-third to 3.5-quart jars of dry grain, place it in a bucket, and soak it. This will provide enough grain for about 10 jars of grain spawn when everything is fully hydrated.
How To Make Self-healing Injection Port Lids
While the grain is soaking, it’s a perfect time to create specialized lids that will enable you to inoculate your sterilized grain without opening the jar. These lids are straightforward to make and eliminate the need for a laminar flow hood.
To create them, drill two holes in a standard jar lid: one larger quarter-inch hole for stuffing a wad of pillow stuffing to create a filter that allows mycelium to breathe as it grows through the sterilized grain, and another smaller 8-inch hole that you cover with a small dab of high-temperature silicone.
Allow the dab of silicone to dry overnight, and it will create a self-healing injection port. You can then inoculate your liquid culture directly through the dab of silicone without opening the jar.
When you inject your liquid culture through the self-healing injection port, the hole closes up immediately, preventing any contaminants from entering. This is why you can inoculate your jars in an open-air environment without requiring a laminar flow hood.
Creating these lids is straightforward, as all you need are your jar lids, pillow stuffing, and high-temperature silicone. However, be sure to use high-temperature silicone, as regular silicone sealant will melt in the pressure cooker. High-temperature silicone is resistant to high temperatures and will not melt during the sterilization process.
How To Make Mushroom Grain Spawn
Once your jars and lids are ready, and your grain has soaked for 12 to 24 hours, it’s time to simmer the grain on the stove. This step ensures that the grains are fully hydrated and softened, making it easier for the mycelium to grow on them.
To do this, simply put your soaked grain on the stove and simmer it for around 15 minutes. Be careful not to boil it too hard or for too long, as this can cause the grains to crack open, resulting in mushy and ineffective spawn.
Once the grains are drained, you can go ahead and fill your jars with the grains, leaving about an inch of headspace at the top. You want to make sure that you don’t pack the grains too tightly into the jars, as this can lead to insufficient airflow and cause problems with the growth of your mycelium.
After filling your jars with the grains, you can put on the specialized lids that you made earlier. You want to make sure that the filter is facing up and the injection port is facing down. Then tighten the lids, but not too tight, as you want to allow some air to escape during the sterilization process.
Now, you’re ready to sterilize your jars. You want to place them in a pressure cooker and sterilize them for about 90 minutes at 15 psi. Once the sterilization process is complete, allow the jars to cool down before inoculating them with your liquid culture syringe.
Inoculating Grain Jars With Liquid Culture
To inoculate the jars, simply remove the tape covering the injection port and sterilize the needle with a flame or alcohol. Then insert the needle into the silicone port and inject your liquid culture into the jar. Once you’re finished inoculating, cover the injection port with a new piece of tape and store the jars in a warm, dark place for a couple of weeks.
After a couple of weeks, you should see white mycelium growing throughout the grains in the jars. At this point, you can use the grain spawn to inoculate your bulk substrate or other jars for further growth. And there you have it, a simple method for making grain spawn at home for your mushroom-growing projects.


